Wiring Harness Basics
The standard aftermarket connector, what each wire color does, and the one rule that keeps your install reversible: never cut the factory harness.
We earn a commission if you buy through links on this page. How this site makes money.
The one rule that matters most
Never cut or splice your car’s factory wiring harness. Everything else in this guide exists in service of that one rule, and it’s the single piece of advice most likely to save you money, time and a ruined resale value. Almost every aftermarket head unit sold in North America ships with a wiring pigtail, and almost every vehicle has a matching vehicle-specific harness adapter available that plugs the two together without a single wire being cut. If you take away nothing else from this page, take away that: buy the adapter, don’t reach for the wire strippers on the factory harness.
The standard aftermarket connector
Most aftermarket head units from major brands — Pioneer, Kenwood, Sony, Alpine, JVC — ship with a wiring pigtail that follows a widely-adopted color convention, generally referred to as the standard aftermarket 16-pin harness. It isn’t a formal ISO-numbered standard the way the DIN chassis size is; it’s a convention consistent enough across brands that a harness adapter built to translate it works the same way regardless of which brand of radio you bought.
Europe uses a genuinely different, standardized connector called ISO 10487 — a keyed multi-pin block rather than a loose pigtail — mapping roughly the same functions to different pins. If you’re wiring a European-market vehicle or radio, don’t assume the North American color code applies; check the ISO 10487 pinout instead.
What each wire color does
Here’s the conventional color code used across the North American aftermarket:
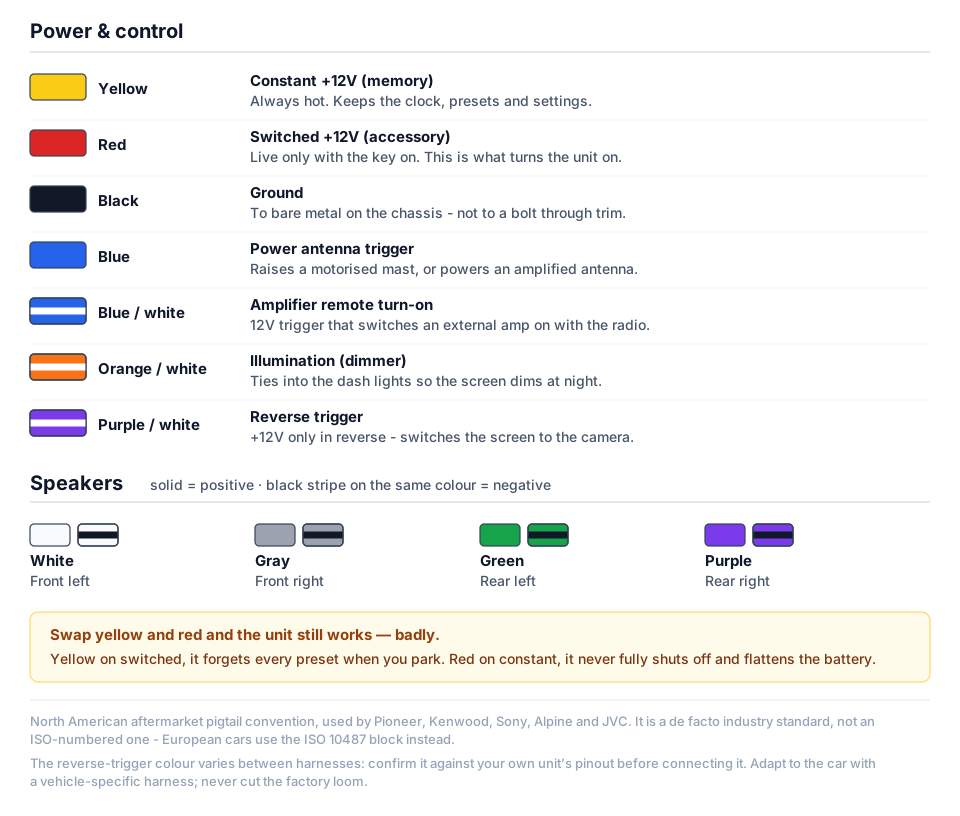
| Wire color | Function | Notes |
|---|---|---|
| Yellow | Constant 12V (memory/battery) | Always hot, direct from the battery. Powers the clock and station presets even with the key off. |
| Red | Switched 12V (accessory/ignition) | Only powered when the ignition is on. This is the wire that actually turns the head unit on and off. |
| Black | Chassis ground | The return path for the circuit. Needs a clean, solid connection to bare metal. |
| Blue | Power antenna trigger | Turns on a motorized or amplified antenna when the radio powers up. |
| Blue with white stripe | Amplifier remote turn-on | 12V trigger that switches on an external amplifier. |
| Orange with white stripe | Illumination/dimmer | Ties to the dash lighting circuit so display brightness dims with the dash lights at night. |
| White (+/-) | Front left speaker | Negative lead usually carries a black stripe. |
| Gray (+/-) | Front right speaker | Negative lead usually carries a black stripe. |
| Green (+/-) | Rear left speaker | Negative lead usually carries a black stripe. |
| Purple (+/-) | Rear right speaker | Negative lead usually carries a black stripe. |
This convention is consistent enough to treat as a reliable default, but “conventional” isn’t “guaranteed” — confirm with a multimeter before trusting a wire’s function on the pigtail in your hands, rather than assuming a color from memory.
Constant versus switched: the distinction that actually matters
Yellow and red look interchangeable to a first-timer, and they are not. Yellow is constant power — live all the time, straight off the battery, whether the key is in the ignition or not. It exists purely to keep the clock running and station presets stored when the radio is otherwise off. Red is switched power, sometimes called accessory power, live only when the ignition is turned to accessory or on. This is the wire the head unit actually uses to know when to turn itself on and off with the car.
Get these two backward and you get one of two outcomes: connect constant power to the switched input and the radio never turns off, silently draining the battery every time the car is parked. Connect switched power to the constant input and the radio loses its memory and clock every time the key turns off — presets wiped, clock reset, every time. Neither failure is dramatic in the moment, which is why it’s a mistake that often goes unnoticed until the battery is flat a week later.
Illumination and the reverse trigger
The orange-with-white-stripe illumination wire is a smaller detail with an outsized effect on how “finished” your install looks. It connects to your dash lighting circuit so the head unit’s screen brightness dims automatically at night along with your other gauges and switches, instead of staying at full daytime brightness and looking out of place after dark. It’s easy to skip because the radio works fine without it — it just looks wrong at night.
A reverse trigger wire (commonly labeled purple/white in aftermarket convention, though the exact color isn’t fully consistent across every harness — verify against your harness’s documentation rather than assuming) supplies +12V only when the transmission is shifted into reverse, telling the head unit to switch its display to a backup camera feed. On many older vehicles this is a simple, direct wire off the reverse light circuit. On newer vehicles, the reverse signal often isn’t a discrete wire at all — it travels over the vehicle’s digital data bus, one reason a plain wiring harness sometimes isn’t enough on its own; see CAN-bus adapters for what that changes.
Why the factory harness stays intact
A vehicle-specific harness adapter — commonly called a T-harness — plugs into the car’s factory connector on one side and the radio’s pigtail on the other, translating pin-for-pin without cutting or splicing anything. Three real reasons this matters more than it might seem:
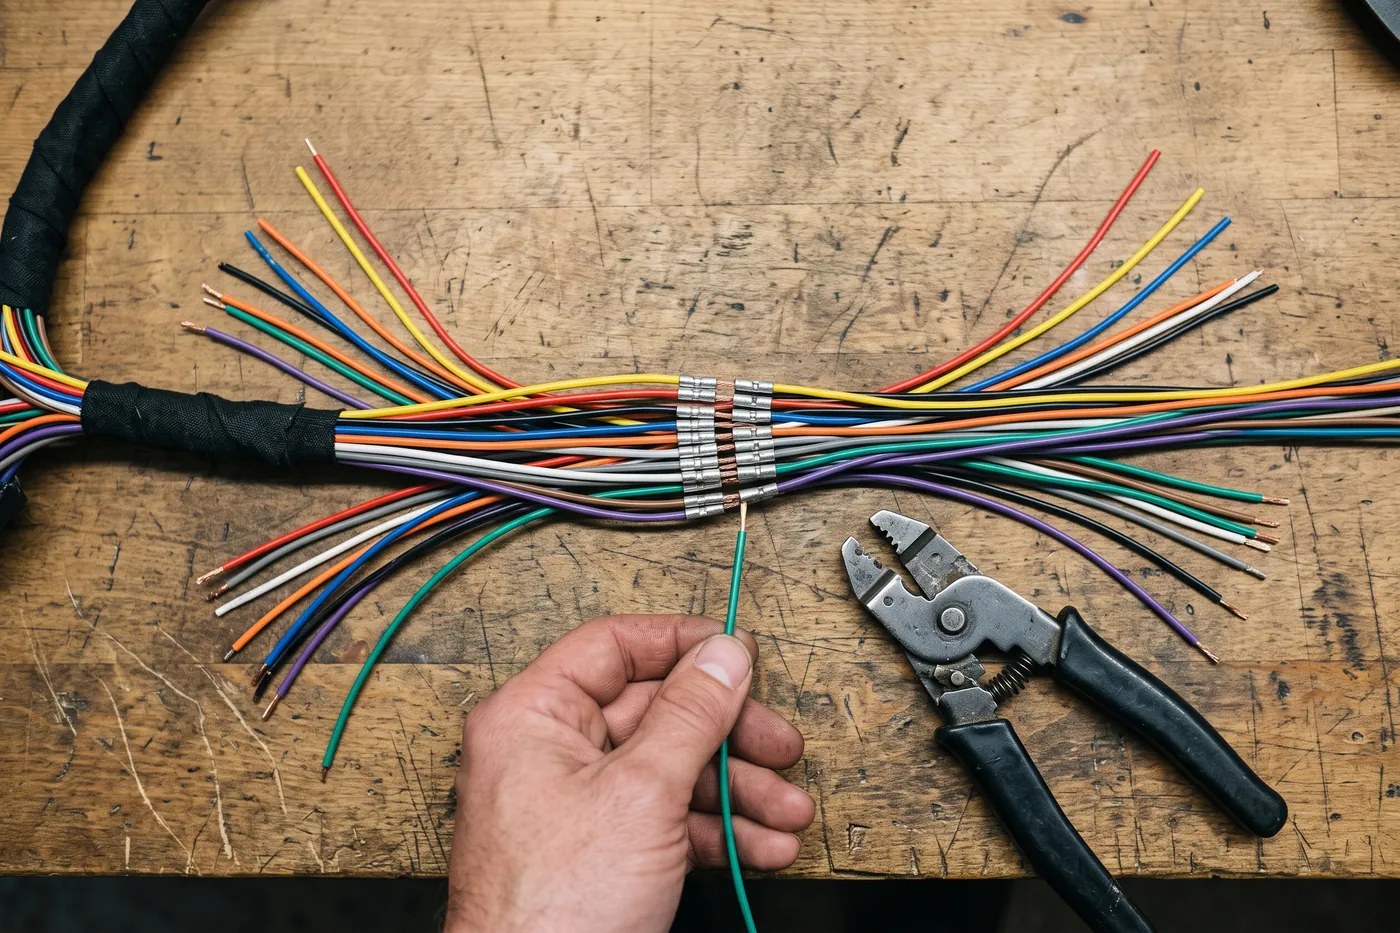
First, it’s reversible. Leave the factory harness untouched and you can put the original radio back in cleanly whenever you want — for a return, a warranty claim, a lease turn-in, or selling the car with its stock dash intact. Cut it, and that option is gone.
Second, splices are less reliable than factory connectors over time. A cut-and-taped or crimped splice is more prone to corrosion, intermittent connections and voltage drop than a factory connector, and those failures tend to show up months later as a flaky camera or a radio that resets randomly — long after you’ve forgotten which splice caused it.
Third, and increasingly the biggest reason: many circuits that look like a simple power or ground wire on a modern vehicle are actually part of a shared CAN-bus or LIN-bus data network carrying signals to other modules — the theft deterrent system, dash chimes, steering wheel controls. Cut the wrong wire chasing what you assumed was a simple power lead, and you can disrupt communication to systems that have nothing to do with the radio at all. A harness adapter designed for your specific vehicle taps the correct pins without that risk.
What to check before you wire anything
Buy the harness adapter built for your specific vehicle, not a generic universal harness with loose wire ends — a universal harness still leaves you to correctly identify your car’s factory pinout, exactly the guesswork a proper adapter is meant to eliminate. A multimeter is worth the small cost: confirm switched versus constant power on the harness in your hands before connecting anything, rather than trusting the color code alone.
From here, dash kits covers the physical mounting side of the same install — including mounting depth if your vehicle’s dash cavity is shallower than the radio needs — and antenna adapters covers the connector your factory antenna almost certainly doesn’t match. If your steering wheel buttons or reverse camera run over a digital signal rather than simple wiring, steering wheel control interfaces and CAN-bus adapters explain what changes. For the full sequence once your harness and kit are both in hand, see how to install a double-DIN head unit.
Frequently asked questions
What is a wiring harness adapter?
A pigtail-to-pigtail adapter, often called a T-harness, that plugs into your car's factory radio connector on one end and your new head unit's connector on the other. It translates between the two without cutting or splicing any wire in either harness.
Why can't I just match wire colors and splice them together?
Because factory wire colors and functions don't follow the aftermarket convention, and on modern vehicles some of what looks like a simple power or ground wire is actually part of a shared data network. Splicing the wrong one can affect chimes, theft deterrence or steering wheel controls, not just the radio.
What's the difference between the yellow and red wires?
Yellow is constant 12V straight from the battery, always live, and it powers the clock and station memory. Red is switched 12V that only turns on with the ignition, and it's what actually turns the head unit on and off. Reversing them is a common first-timer mistake.
Do I need to buy a specific harness adapter for my car, or is there a universal one?
You need one built for your specific vehicle, or at minimum your vehicle's connector family. A universal harness with bare wire ends still requires you to identify your car's factory pinout correctly, which reintroduces the exact risk a T-harness is meant to avoid.
What does the orange/white wire do?
It's the illumination or dimmer wire. It ties into your dash lighting circuit so the head unit's display brightness dims automatically with your dash lights at night, instead of staying at daytime brightness.
Check what fits your car
Every unit above still has to physically fit your dash. These pages list what actually bolts into these vehicles, plus the dash kit, harness and adapters each swap needs: